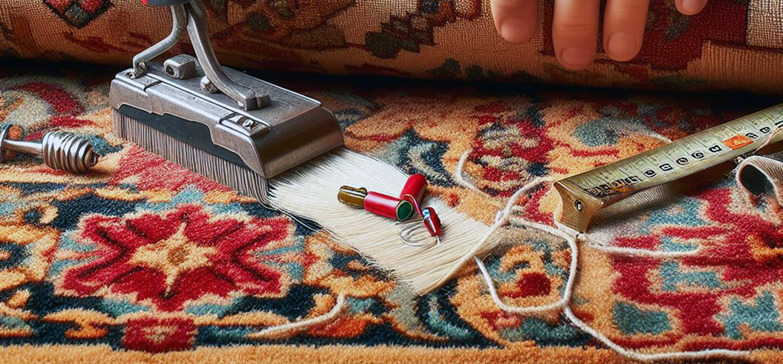
Carpet Repair: A DIY Guide to Revive Your Flooring
Carpets add warmth, comfort, and style to our living room but aren’t immune to wear and tear. From pet stains to tears and frays, carpet damage can quickly detract from the overall look and feel of your living space. While calling a professional carpet repair service is always an option, tackling minor repairs yourself can save you time and money. With a little patience and the right tools, you can restore your carpet to its former glory. In the following, we will take a closer look at carpet repair.
| Table of Contents |
| Patching Minor Damage |
| Replacing Large Holes |
| Final Touches |
Identifying the Damage
Before you start repairing your carpet, it’s important to assess the extent of the damage. Small nicks, cuts, and burns can be easily patched, while larger holes or tears may require more extensive repair techniques. If the damage is severe, it’s best to consult a professional to avoid further compromising your carpet’s integrity.
Gathering Supplies
Once you’ve determined the nature of the damage, you can gather the necessary supplies for your repair project. A few essential items include:
- Sharp utility knife: For precisely cutting the damaged area and donor carpet patches
- Carpet seam tape: A strong adhesive tape that helps blend the patch with the surrounding carpet
- Carpet glue: For attaching patches to the carpet backing
- Scissors: For trimming excess carpet and seam tape
- Carpet roller or comb: To blend the patch with the surrounding carpet and create a seamless transition

Patching Minor Damage
For small tears, nicks, or burns, a simple patch can restore your carpet’s appearance. Follow these steps to patch minor damage:
- Clean the damaged area: Remove any dirt, debris, or stains from the damaged area to ensure a proper bond.
- Measure and cut the patch: Measure the damaged area and cut a patch of matching carpet from an unused area or a remnant from the original installation. Ensure the patch is slightly larger than the damaged area.
- Remove the backing: Carefully peel off the backing from the patch and the damaged area.
- Apply adhesive: Apply a thin layer of carpet glue to the back of the patch and the underside of the damaged area.
- Align the patch: Carefully align the patch over the damaged area, ensuring the pile direction matches.
- Press and secure: Press the patch firmly in place, using a carpet roller or comb to blend the fibers and create a seamless transition.

Replacing Large Holes
For larger holes or tears, replacing the entire damaged section is often necessary. Follow these steps to replace a large hole:
- Cut out the damaged area: Use a sharp utility knife to carefully cut out the damaged section, extending the cut beyond the edges of the hole to allow for overlap with the new patch.
- Measure and cut the replacement piece: Measure the cut-out area and cut a replacement piece of matching carpet from an unused area or a remnant from the original installation. Ensure the replacement piece is slightly larger than the cut-out area.
- Apply adhesive: Apply a thin layer of carpet glue to the underside of the replacement piece and the remaining area around the hole.
- Position and secure: Carefully position the replacement piece over the hole, aligning the pile direction. Press firmly in place, using a carpet roller or comb to blend the fibers and create a seamless transition.

Final Touches
Once the patch or replacement piece is in place, allow the adhesive to dry completely. Use a carpet brush or vacuum cleaner to remove any excess debris or fibers. If necessary, trim any excess carpet or seam tape around the edges for a clean and polished finish.
Remember, patience and attention to detail are key to successful carpet repairs. With a little effort, you can restore your carpets to their former glory and extend their lifespan.
FAQ
You can definitely tackle minor repairs like small tears, nicks, and burns yourself! This guide provides step-by-step instructions for patching these issues using basic tools and supplies. However, for larger holes, extensive fraying, or water damage, consulting a professional carpet repair service is recommended to ensure proper repair and avoid further damage.
Here are some essential items you’ll need for DIY carpet repairs:
Sharp utility knife: For precise cutting.
Carpet seam tape: Strong adhesive for blending patches seamlessly.
Carpet glue: To attach patches securely.
Scissors: For trimming carpet and seam tape.
Carpet roller or comb: To smooth and blend the repaired area.
Additional supplies: Depending on the damage, you might need cleaning products, sandpaper, or thread for sewing minor tears.
Pay close attention to these key points:
Match the pile direction: Ensure the patch or replacement piece has the same direction of fiber orientation as the surrounding carpet.
Use the right amount of adhesive: Apply a thin layer to avoid bumps and ensure proper bonding.
Press firmly and blend: Use a carpet roller or comb to flatten the patch and blend the fibers seamlessly.
Trim carefully: Remove any excess carpet or seam tape for a clean and finished look.


